

안녕하세요.!! Lotts 입니다. 😉
저번 시간에 이어서
VanillaJS로 크롬 Momentum 만들기
✌ 두 번째 시간입니다. 😃😃
이전 포스팅은 아래 링크를 눌러주세요 😉
2020/03/10 - [프로그래밍/JavaScript] - Nomad Coders 강의 - VanillaJS로 크롬 momentum 만들기
Nomad Coders 강의 - VanillaJS로 크롬 momentum 만들기
안녕하세요.!! Lotts 입니다. 😉 요새 니콜라스 쌤이 하시는 Nomad Coders 인강을 듣고 있어요. 자막도 한글도 잘 되어있고 무료 인강도 많아서 가볍게 보고 따라 하기에 좋은 거 같아요. 👍👍 이번에 소개할 내..
msyu1207.tistory.com
두번째 시간에는
전에 언급했던
세 번째, 날씨 정보 가져오기 🌈
네 번째, 랜덤 하게 배경 이미지 가져오기 📺
입니다.
바로 시작하도록 하겠습니다. 👀👀
세 번째, 날씨 정보 가져오기 🌈
const COORDS = 'coords';

function loadCoords(){
  const loadCoords = localStorage.getItem(COORDS);

  if(loadCoords === null){
    askForCoords();
  } else {
    const parseCoords = JSON.parse(loadCoords);
    getWeather(parseCoords.latitude,parseCoords.longitude);
  }
}

function init() {
  loadCoords();
}

init();
loadCoords()를 호출하여 localStorage에 정보를 가져옵니다
localStorage에 위도(latitude)와 경도(longitude) 정보가 있다면
해당 정보를 JSON.parse() 메서드를 이용하여
문자열을 자바스크립트 객체로 변환하여 날씨정보(getWeather)를 가져오도록 합니다
맨 처음 시작하면 당연히 localStorage에 정보가 없겠죠? 😏
그럼 askForCoords()를 호출하여
현재 위치의 위도(latitude)와 경도(longitude)를 가져오도록 할게요
const COORDS = 'coords';

function saveCoords(coordsObj){
  localStorage.setItem(COORDS,JSON.stringify(coordsObj));
}

function handleGeoSuccess(position){
  const latitude = position.coords.latitude;
  const longitude = position.coords.longitude;
  const coordsObj = {
    latitude,
    longitude
  }
  saveCoords(coordsObj);
  getWeather(latitude,longitude);
}

function handleGeoError(position){
  console.log("cant access geo location");
}

function askForCoords() {
  navigator.geolocation.getCurrentPosition(handleGeoSuccess, handleGeoError);
}
위치정보는 브라우저에서 아주 간단히 가져올 수 있어요
바로 navigator.geolocation를 이용합니다

개발자 도구 - Console창에 다음과 같이 작성하면
getCurrentPosition
watchPosition
clearWatch
Etc....
나와요 😵😵
다른 건 잘 모르니까 넘어가고 🙆
이 중에서 저희는 getCurrentPosition를 이용하여 정보를 가져오도록 할게요
navigator.geolocation.getCurrentPosition(successCallback, errorCallback, options)
구문으로 되어있고
successCallback - GeolocationPosition 객체를 매개변수로 받는 콜백 함수
errorCallback- GeolocationPositionError 객체를 매개변수로 받는 콜백 함수
입니다.
👍👍
소스에서는
successCallback함수를 handleGeoSuccess
errorCallback함수를 handleGeoError
만든 후에
handleGeoSuccess에서 받은 매개변수에서
각각 latitude, longitude를 가져옵니다
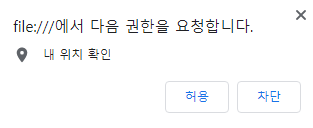
페이지에서 호출하면 위와 같은 팝업창? 경고창? 안내 창?(뭐라고 불러야 하나) 이 나타납니다
허용을 하셔야 정보를 가져올 수 있어요 😊
이후 saveCoords()에서
localStorage에 저장을 하도록 합니다
그다음 날씨를 가져오는 getWeather()를 호출합니다
const weather = document.querySelector(".js-weather");
const API_KEY = 'API KEY';

function getWeather(lat,log){
  URL = `https://api.openweathermap.org/data/2.5/weather?lat=${lat}&lon=${log}&appid=${API_KEY}&units=metric`
  fetch(URL).then(function(response){
    return response.json()
  }).then(function(json){
    const temperature = json.main.temp;
    const place = json.name;
    const icon = json.weather[0].icon;
    imgIcon = `http://openweathermap.org/img/w/${icon}.png`
    const image = new Image();
    image.src = imgIcon;
    weather.innerText = `온도 : ${temperature} 위치 : ${place}`
    weather.appendChild(image);
  });
}
얼마 남지 않았어요 🙈 🙉
지금까지 구한 위도, 경도를 이용하여
날씨를 가져오도록 할게요 👏
날씨를 가져오기 위해서는 OpenWeatherMap 사이트에서 api를 이용할게요
아래 사이트로 들어가시면 됩니다
https://openweathermap.org/api
Weather API - OpenWeatherMap
We have combined Weather services and Satellite imagery in a simple and fast Agro API. We have also launched a Dashboard for it - it is a visual service where you can easily work with satellite, weather and historical data, soil temperature and moisture, a
openweathermap.org
회원가입 후 생성된 API KEY를 이용하여
현재 날씨 정보를 가져옵니다

저희는 위도와 경도를 알고 있기 때문에
여러 API 중 By geographic coordinates를 사용할게요
아래처럼 응답 메시지가 나옵니다 👍👍

이 중에서 우리가 사용할 정보는
main - temp (온도) 🌞
name (지역) 🌏
weather[0] - icon (날씨 아이콘) 🌛
입니다
🙋 ❛ icon정보는 강의에는 없구요
제가 추가해서 가져와 봤습니다 ❜
❖
❝ 참고로 api를 sample처럼 전송하면 온도가 화씨(Fahrenheit)로 나오기 때문에
uri에 &units=metric 추가해 주셔야 섭씨(Celsius)로 나온답니다 ❞
그다음
fetch() 를이용하여 json 정보를 받아오면
완성입니다

온도와 지역 위치
그리고 현재 날씨의 아이콘 정보를 볼 수 있어요
아직 날씨가 많이 쌀쌀하네요
👋👋👋👋👋👋
이상으로 ❝ VanillaJS 날씨정보 가져오기 ❞ 였습니다. ❗❗❗
원래는 배경 이미지도 같이 하려고 했으나
생각보다 내용이 길어져서 다음 포스팅에서 마무리하도록
할게요 (쿨럭..)
다음 포스팅은
네 번째, 랜덤 하게 배경 이미지 가져오기 📺
하도록 하겠습니다.
이상
Lotts 였습니다. 😁😁
'Programming > JavaScript' 카테고리의 다른 글
| Nomad Coders 강의 - VanillaJS로 크롬 momentum 만들기 3 (1) | 2020.03.23 |
|---|---|
| Nomad Coders 강의 - VanillaJS로 크롬 momentum 만들기 1 (3) | 2020.03.10 |